
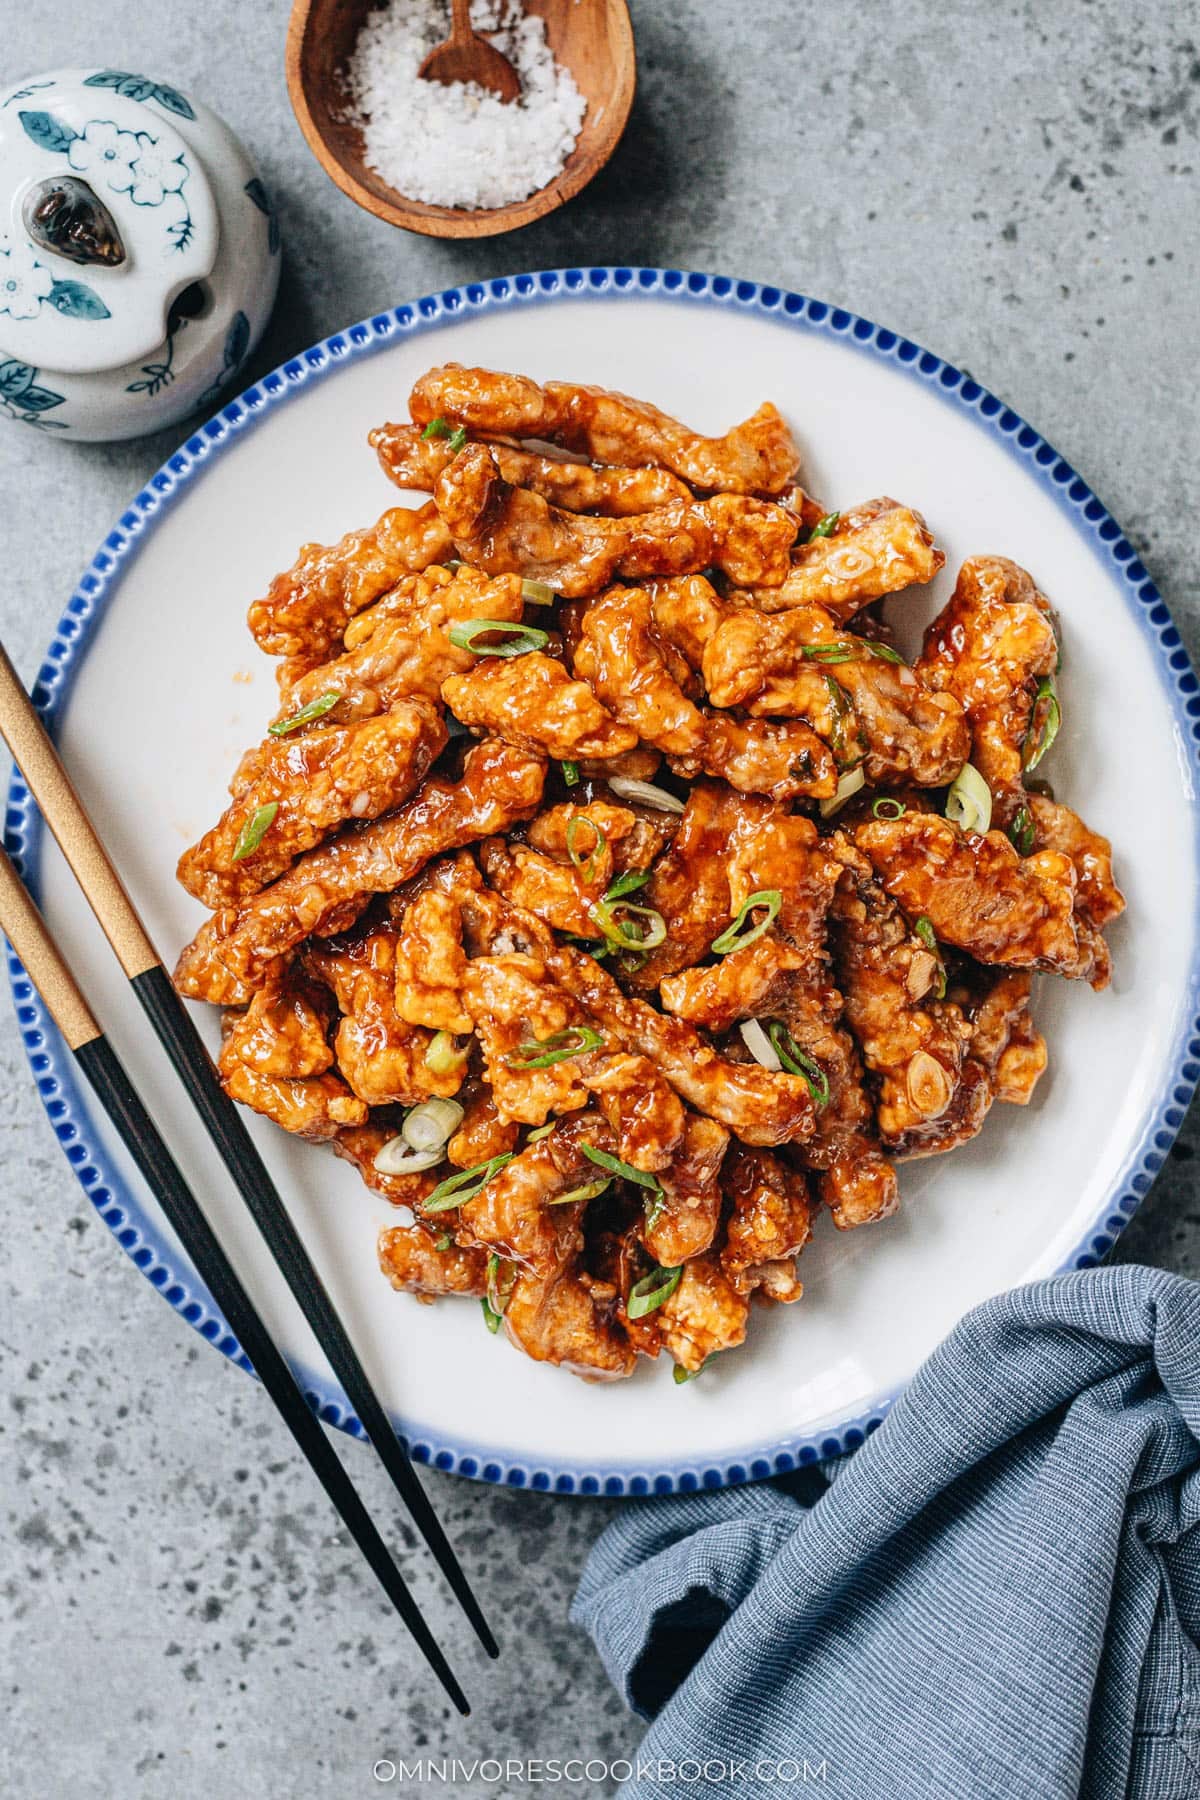
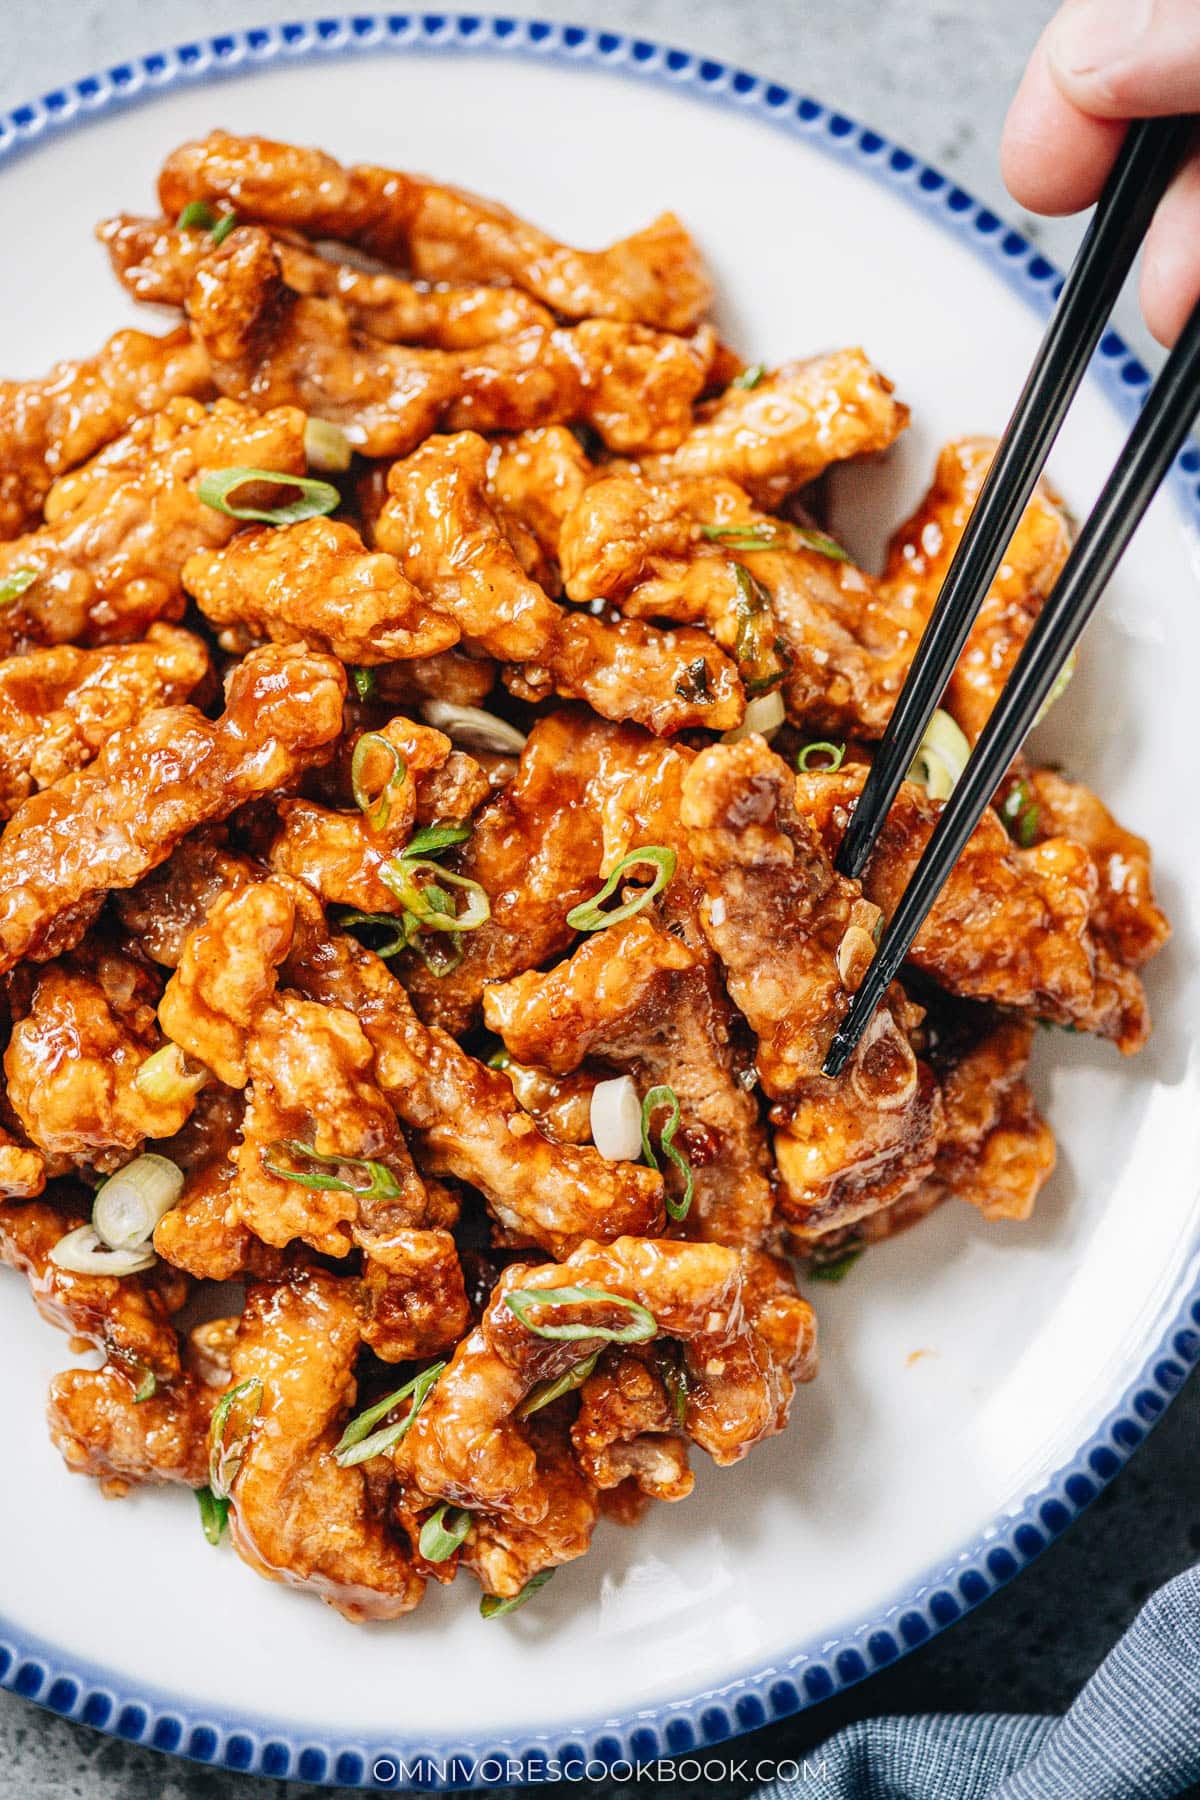
Unlike the American Chinese takeout version, sweet and sour pork is a real Chinese dish you’ll find on menus across China. My recipe is much closer to the one I grew up eating than the sugary, deep-fried takeout version. Restaurants back home double fry the pork to a crackling shell that can stand up to a heavier pour of sauce, and the pieces come out very crispy on purpose. My homemade version pan-fries the pork with a fraction of the oil, which gives me a nice crispy pork bites, though I want to be upfront that the pork will not stay very crispy once it sits in the sauce.
Even though I have cooked many sweet and sour dishes over the years, this recipe was the one I tested the most times to get the sauce ratio right. I tested with rice vinegar, Chinkiang vinegar, and apple cider vinegar, each with and without ketchup, before the apple cider vinegar and ketchup pair came out on top. I love that the winning sauce is fruity, sour enough to be pungent when you pick up a piece, and never so sharp that it takes over the plate.
My sweet and sour pork recipe uses just enough sauce to coat the pork, close to what I eat in China rather than the pool of glaze you get with takeout, which is why the pork seasons well and keeps a nicer texture instead of getting soggy fast. To put this on the table, I cut the pork into matchsticks, marinate it with salt and oil, coat it in beaten egg and cornstarch, pan-fry the pieces in batches, and toss them with a quick garlic and green onion sauce right at the end.
I developed this recipe especially for busy families here in New York and for all of you around the world who follow me. If you’re looking for an easy homemade meal, give this one a try. It’s ready in less than 40 minutes, tastes so much better than takeout, and will save you a few bucks by making it at home instead of ordering out.
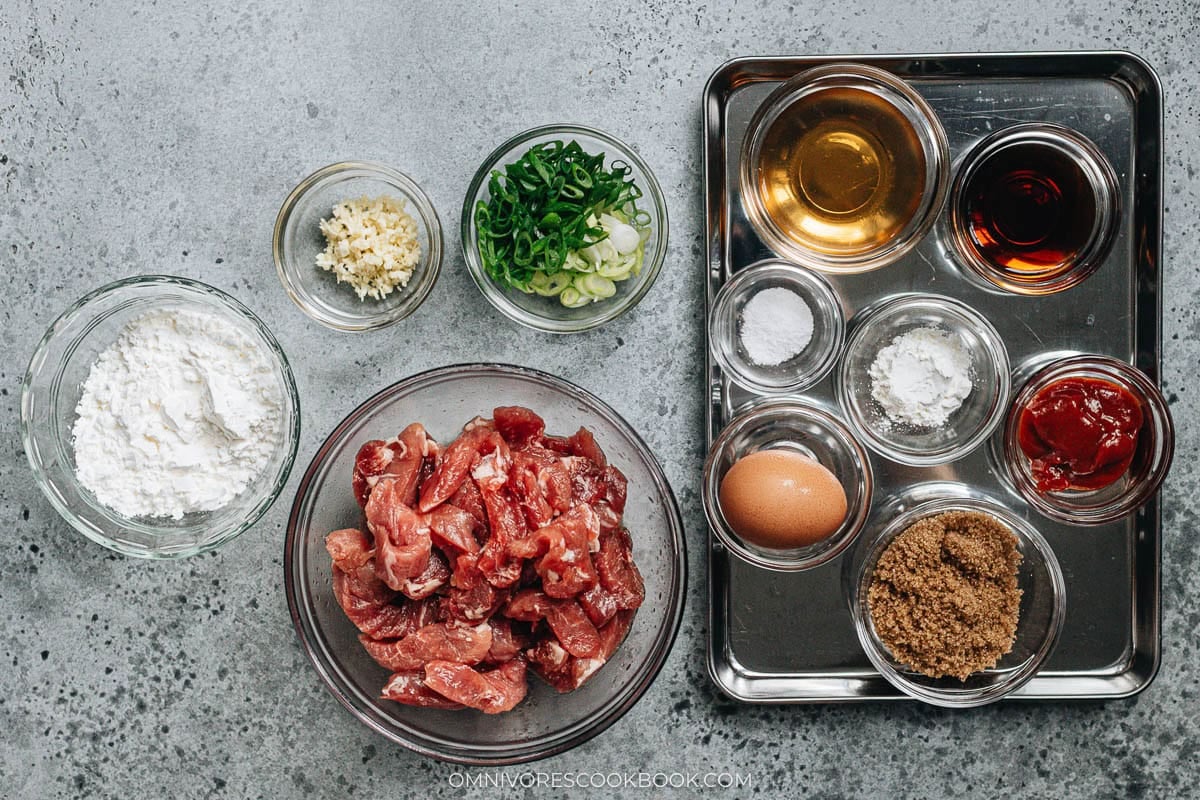
Ingredients
Most sweet and sour pork recipes call for a long list of pantry ingredients, but in mine the sauce comes down to 4 things and the coating is just egg and cornstarch.
Pork: I use pork tenderloin because the meat is trim and tender, which gives me a juicy result inside the crispy coating. Pork loin is my second pick when I cannot find tenderloin. I have tried pork chops in the past and the meat came out tougher and drier, so I do not use them for this dish anymore.
Pork marinade: I season the raw pork with salt and a spoonful of peanut oil, which coats the surface and helps the egg and cornstarch stick when I dredge later.
Sweet and sour sauce: I stir the sauce together from ketchup, apple cider vinegar, Shaoxing wine, brown sugar, cornstarch, and salt. To make the dish gluten-free adaptable, I swap the Shaoxing wine for dry sherry and use a gluten-free ketchup.
Coating: I mix the marinated pork in a beaten egg first, then toss the pieces in cornstarch until the surface holds an uneven layer with a little dry powder still clinging. This is the same pan-frying coating I use across my Chinese fried recipes, and it crisps up in shallow oil without deep frying.
Aromatics: I finish the sauce with sliced green onion and minced garlic, added to the wiped-clean wok after the pork is done. A short bloom in hot oil is all they need before the sauce goes in.
Frying oil: I pan-fry the pork in peanut oil because it takes high heat. Vegetable oil is my backup when peanut oil is not in the pantry.
How to Make
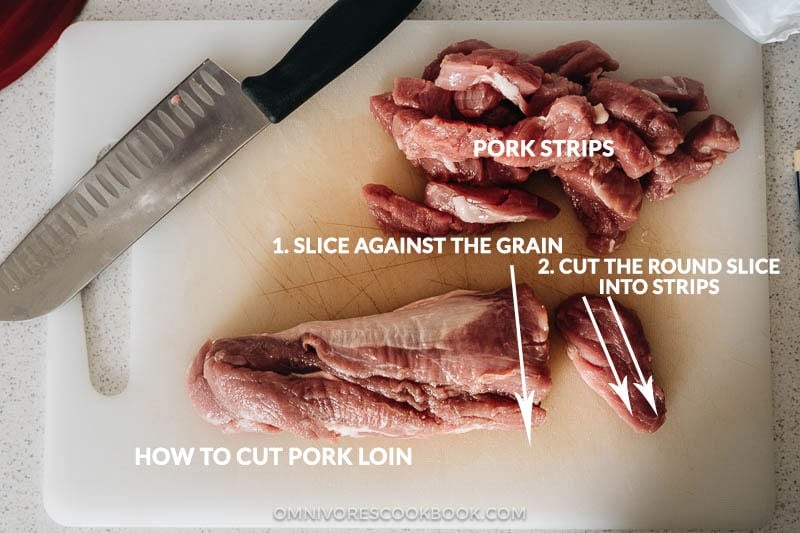
1. Cut the pork into matchsticks: Slice the pork tenderloin crosswise into rounds a 1/2 inch thick, then cut each round into strips a 1/2″ (1 cm) thick and 2″ (5 cm) inches” long.
2. Marinate the pork: Combine the pork strips and salt in a medium bowl and mix well with your hands. Add the peanut oil and mix again, then let the pork sit for 15 minutes while you prep everything else.
3. Mix the sauce: Stir the ketchup, apple cider vinegar, Shaoxing wine, brown sugar, cornstarch, and salt together in a small bowl until the sugar dissolves. Set aside.
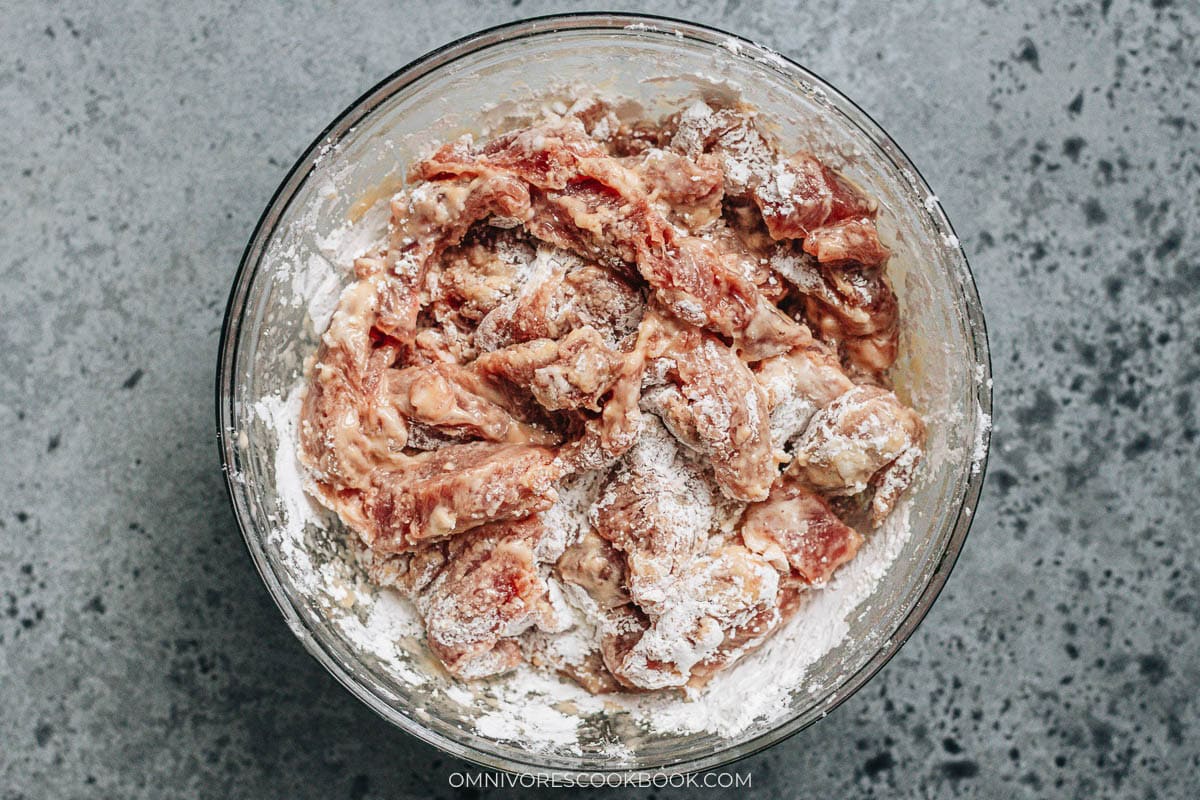
4. Coat the pork: When you are ready to cook, add the beaten egg to the bowl of marinated pork and stir to coat. Add the cornstarch and stir until the pork holds an uneven coating with a little dry cornstarch still loose in the bowl.
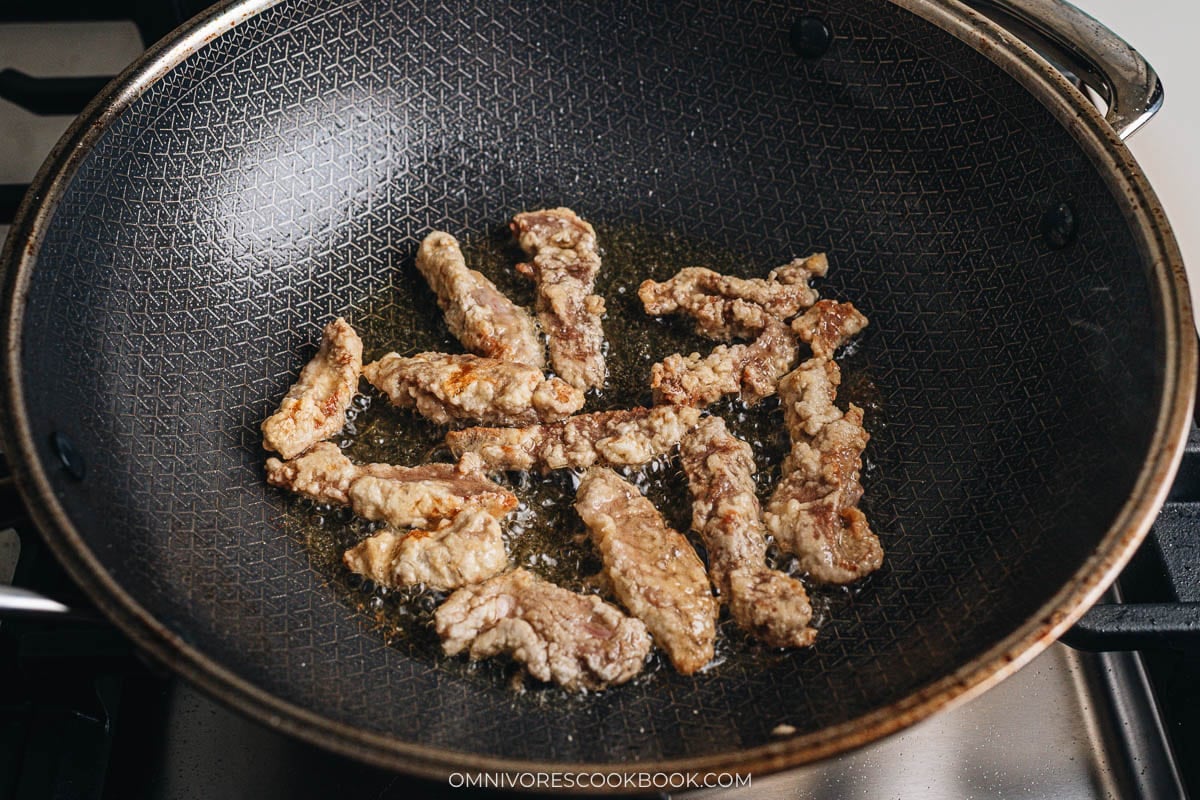
5. Pan fry the pork: Heat the peanut oil in a wok over medium-high heat until it shimmers. Add the pork one piece at a time in a single layer without overlapping, cook without touching for 2 minutes until the bottom turns golden, flip and cook the other side for 1 minute, then transfer to a plate. Cook the rest of the pork in batches the same way.
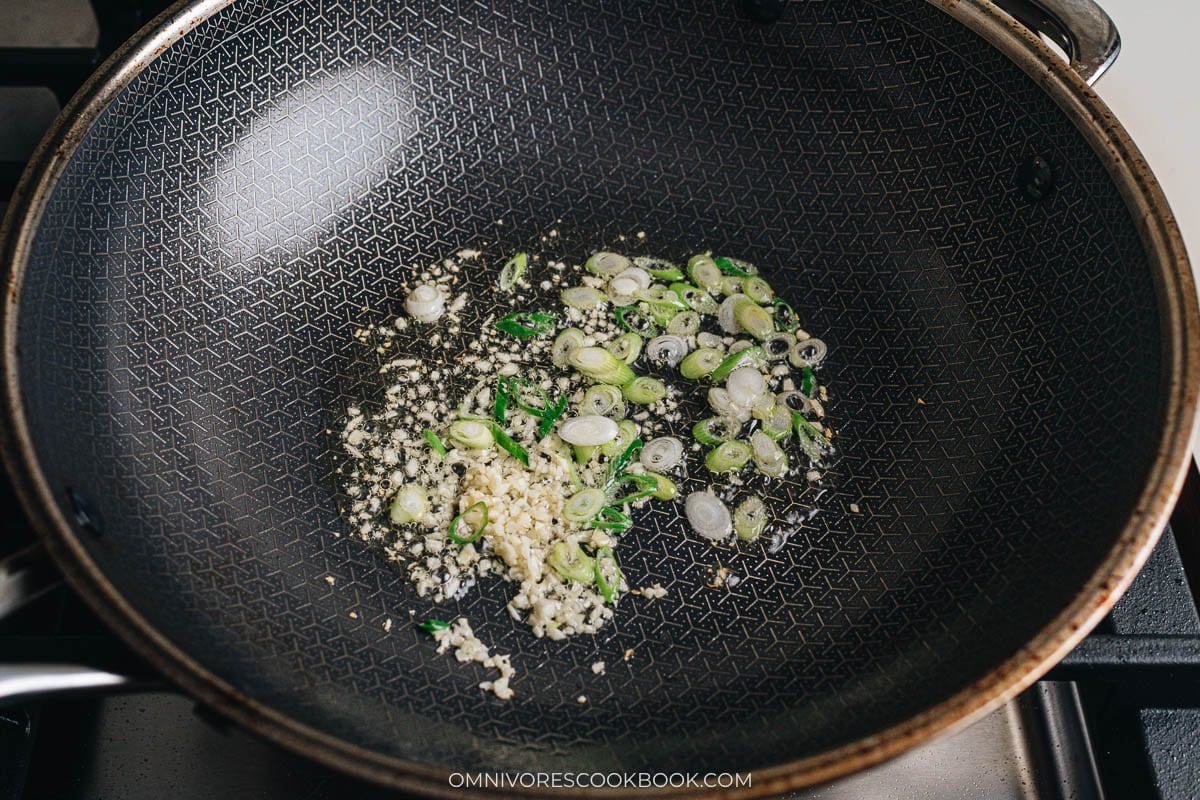
6. Bloom the aromatics: Wipe the wok clean and return it to the heat with 1 tablespoon of oil. Add the green onion and garlic and stir a few seconds until fragrant.
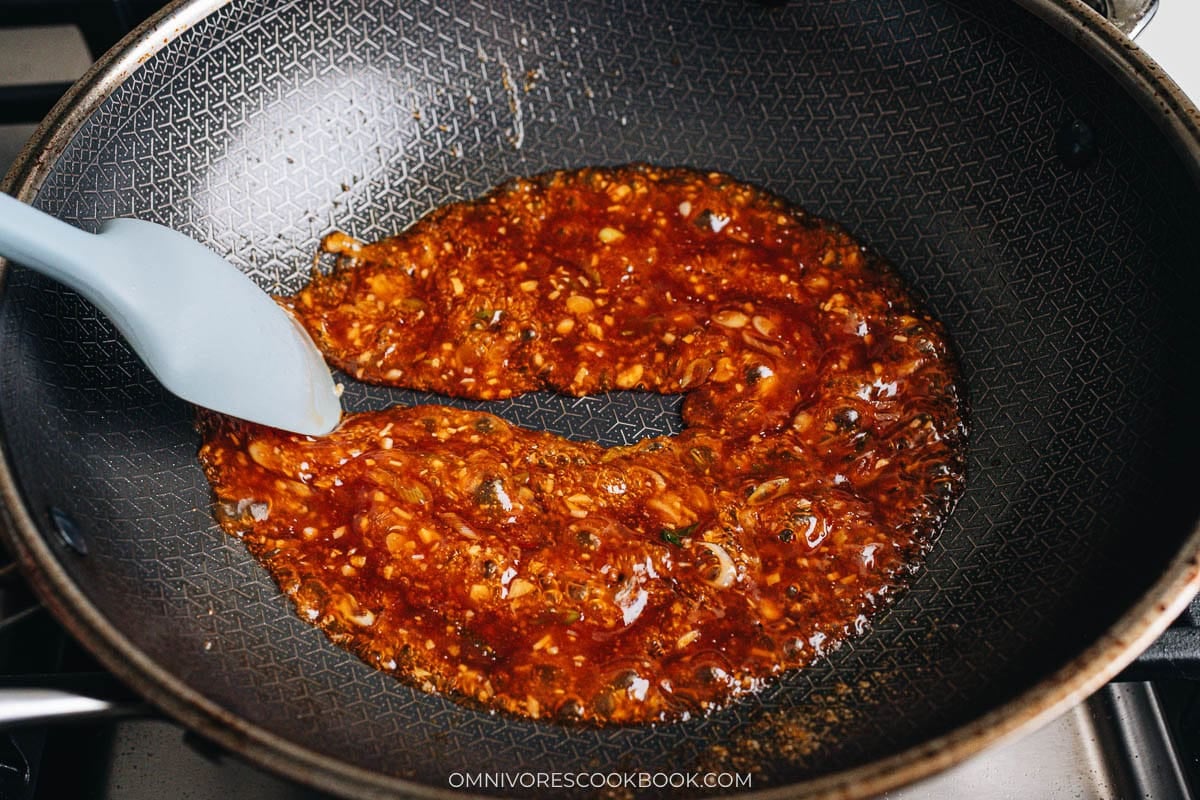
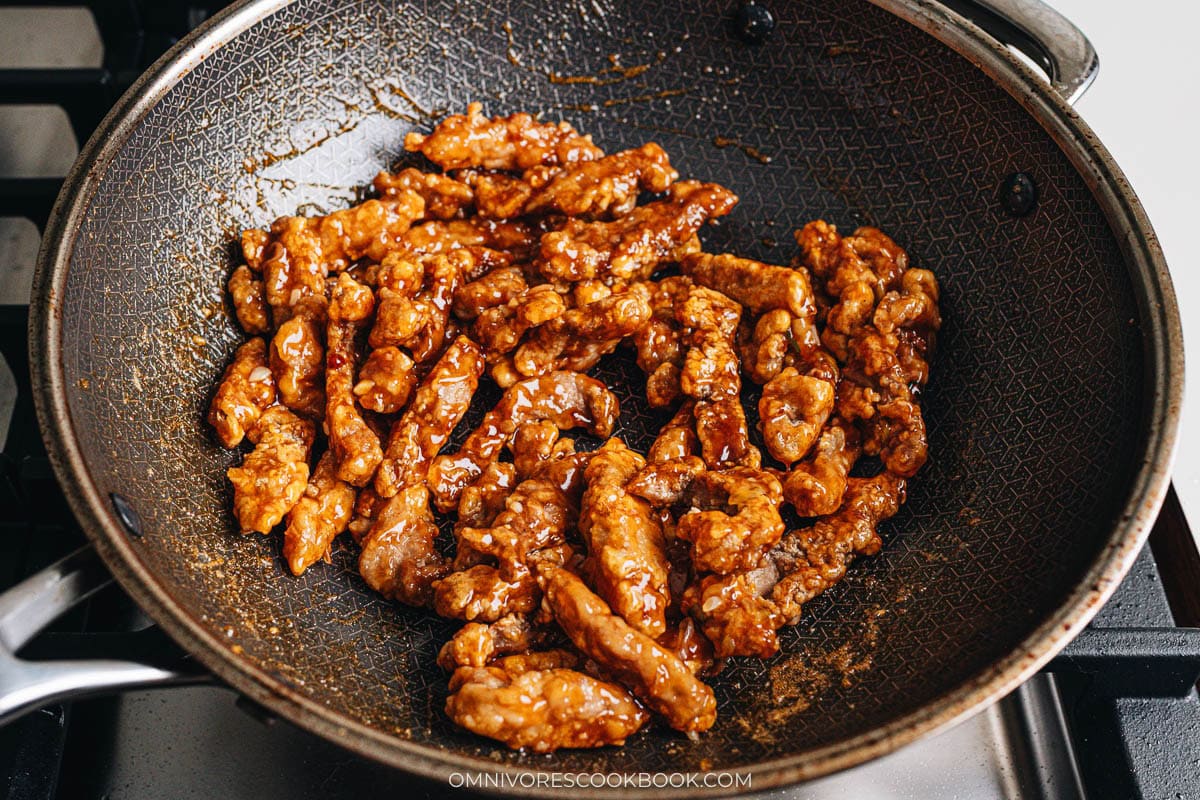
7. Thicken the sauce: Stir the sauce again to dissolve the cornstarch, pour it into the wok, and stir until it thickens to the point where a spatula draws a line on the bottom of the pan without the sauce running back too quickly.
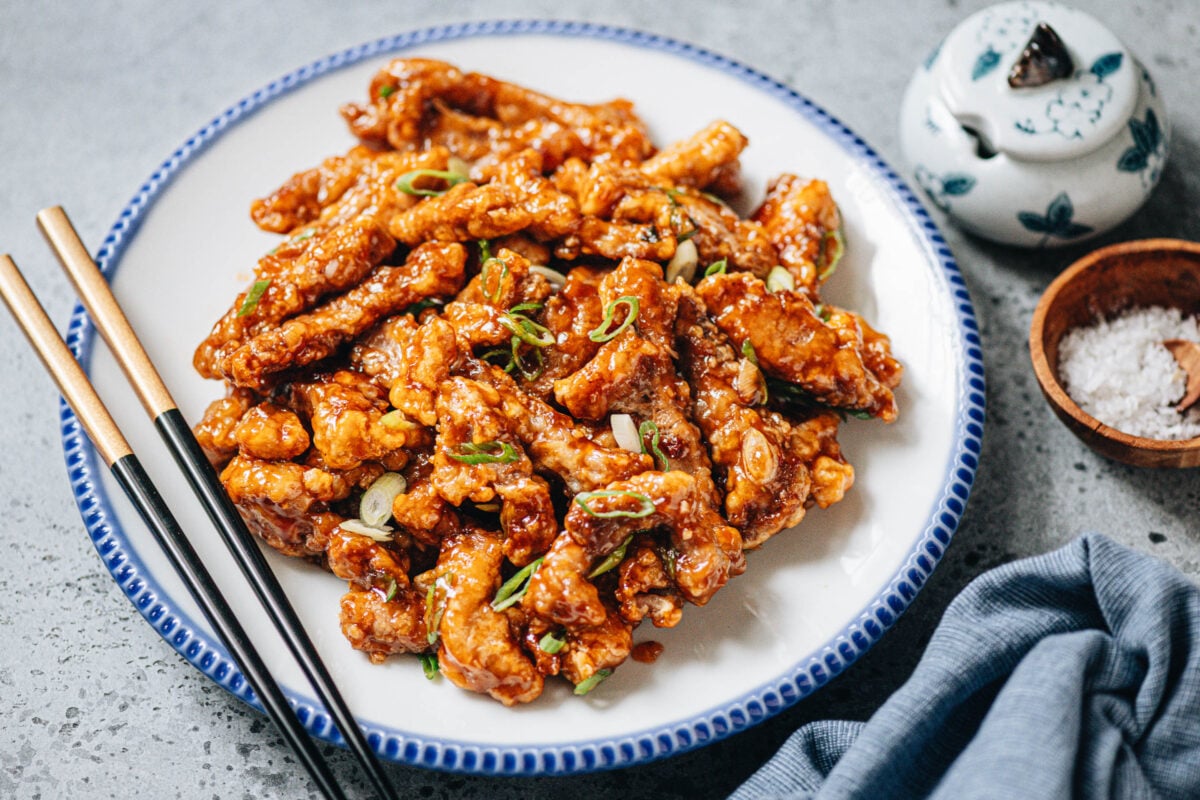
8. Toss the pork in the sauce: Return the fried pork to the wok and stir for about 30 seconds until every piece is coated. Transfer to a plate right away and serve hot as a main.
My Cooking Tips
Cut the pork against the grain: Slicing across the muscle fibers gives me a tender bite once the pork is cooked. I look at the direction the grain goes on the tenderloin, turn it a quarter turn, and cut perpendicular to those lines.
Pan fry with enough oil to cover the pan bottom: A 1/3 cup of oil is my minimum for this recipe, and 1/2 cup gives me a crisper crust.
Cook the pork in batches, not all at once: The cornstarch-coated pieces are very sticky before they meet the oil, and a crowded pan means the strips glue together and the coating pulls off. Cooking in a few batches let each piece brown on both sides.
Rest the fried pork on a plate before saucing: Once the pork comes out of the oil, I let it sit for 1 to 2 minutes so the coating hardens and holds up better once the sauce goes on. Skipping this step is one reason home versions turn soggy quickly.
Cook the sauce until it is glossy and thick: The sauce needs to reduce until a spatula draws a line on the bottom of the wok without the liquid running back. Undercooked sauce tastes sharp on the vinegar side and never grips the pork.
My Favorite Way to Serve It
A few friends came over the other day and I put this pork on the table with a bowl of steamed rice and a little bit of everything else I had in the fridge. I prepare a delicious spicy cucumber salad for them to snack on while I finished the last batch at the stove, and once we sat down there was a big bowl of Chinese egg drop soup in the middle and a plate of Chinese broccoli with oyster sauce next to the pork. They all loved the menu!
When it is just my husband, my relatives, and me on a weeknight, I keep the table smaller and let the pork share the plate with one more protein. I usually add string bean chicken as the second main so the table has 2 different flavors going, and I put authentic hot and sour soup at the center. My husband refills the rice bowl for everyone at least twice, and by the end of dinner the pork plate is scraped and my relatives are asking me to write the sauce down for them.
Frequently Ask Questions
Do I need a wok to make this at home?
No, a large heavy skillet works well for this recipe. The wok is what I use because the sloped sides make it easier to toss the pork with the sauce at the end without pieces flying out. If you are using a regular skillet, a slightly larger pan gives you room to lay the pork out in a single layer and brown it in fewer batches.
Can I deep-fry the pork instead of pan-frying?
Yes. Deep-frying will produce an even crispier coating. Fry the pork at 350°F (175°C) until golden brown, drain well, then toss with the sauce just before serving.
Can I add vegetables?
Yes. Although this northern Chinese version focuses on the pork and sauce, you can add bell peppers, onions, pineapple, or carrots if you prefer a takeout-style dish.
Why isn’t my pork crispy?
This recipe uses a pan-frying method to create a texture that’s somewhere between crispy and chewy. Because the pork isn’t deep-fried, it won’t have the same ultra-crispy coating you’d get at a restaurant. That said, if your pork turned out soggy instead of lightly crisp, there are a few common reasons: the oil wasn’t hot enough before adding the pork, the pan was overcrowded, the pork wasn’t given enough time to brown before flipping, or it sat in the sauce for too long before serving. For the best texture, let the fried pork cool for a minute or two before tossing it with the sauce, and serve it immediately.
Want to Save This Recipe?
Enter your email below & we’ll send it to your inbox. Plus get great new recipes from us every week!
Sweet and Sour Pork (糖醋里脊)
Ingredients
- 1 lb pork tenderloin (or pork loin)
Marinade
- 1/2 teaspoon salt
- 1 tablespoon peanut oil (or vegetable oil)
Sauce
- 2 tablespoons ketchup
- 4 tablespoons apple cider vinegar
- 2 tablespoons Shaoxing wine
- 4 tablespoons brown sugar
- 2 teaspoons cornstarch
- 1/2 teaspoon salt
Stir-fry
- 1 egg , beaten
- 1/2 cup cornstarch
- 1/3 to 1/2 cup peanut oil (or vegetable oil)
- 2 green onions , sliced
- 2 cloves garlic , minced
Instructions
- Slice the pork loin crosswise into 1/2” (1 cm) round pieces. Then cut the round piece into strips that 1/2” (1 cm) thick and 2" (5 cm) long.
- Combine the pork pieces and salt in a medium bowl. Mix well with hands. Add vegetable oil and mix again. Marinate for 15 minutes while you prepare the other ingredients.
- Mix all the sauce ingredients in a small bowl and set aside.
- When you’re ready to cook, add the beaten egg into the bowl with the pork. Stir to mix well. Add the cornstarch. Stir to coat the pork until it forms an uneven coating with a little dry cornstarch left unattached.
- Heat the oil in a wok over medium high heat until shimmering. Cook the pork in batches by adding them one piece at a time, without overlapping. Cook without touching the pork for 2 minutes or so, or until the bottom turns golden. Flip to cook the other side, 1 minutes or so. Transfer the pork to a big plate. Cook the rest of the pork. (*Footnote 1)
- Once the pork is done, wipe the wok clean. Add 1 tablespoon oil, the green onion and garlic. Cook and stir a few times until it releases its fragrance, a few seconds.
- Stir the sauce again to dissolve the cornstarch completely. Pour it into the pan. Stir and cook until it thickens, when you can draw a line on the bottom with a spatula without the sauce running back immediately. (*Footnote 2)
- Add back the cooked pork and stir to coat with sauce, about 30 seconds. Transfer everything to a plate immediately. Serve hot as a main dish.
Notes
- The pork pieces will be very sticky because of the cornstarch. Cooking in batches ensure each piece to brown evenly, creating a better result.
- It’s important to thoroughly cook the sauce, so the vinegar will taste less sharp and the sugar cooks properly and becomes glossy.
Nutrition

Did you make this recipe?
I’d love to hear how it turned out for you! Please take a moment to leave a 5-star rating ⭐️ and share your thoughts in the comments further down the page. It really helps others discover the recipe too.
Alan C Citron
This is freaking great. Maggie’s right. It’s lighter and better than the gloppy version served at most restaurants. I’ve learned to trust her guidance. The Sichuan Shrimp is also a winner. I can’t wait to try more of her recipes.
Carolyn
Loved this! So much better than that over breaded with goopy red sauce stuff! I think next time I would make double sauce. Other than that I made it as directed and it was delicious!!
Beatrice
This was so tasty and easy! My husband’s comment was “this doesn’t really taste like sweet+sour pork but it’s really good”. I think he was expecting the gloopy restaurant version. Will be working this into our rotation!
Mike
We did the sweet and sour pork with pineapple thing. Used char siu from your recipe, no breading and a stir fry of veggies. Not your recipe in the end but we used your sauce mix. The sauce was enough for 1/2 pound of pork plus vegetables. Met the brief. Your site is our go to for inspiration as we explore Chinese cuisine, thanks.
Bec
So good! A regular recipe in our house.